Veneered Inlay and Sand Shading
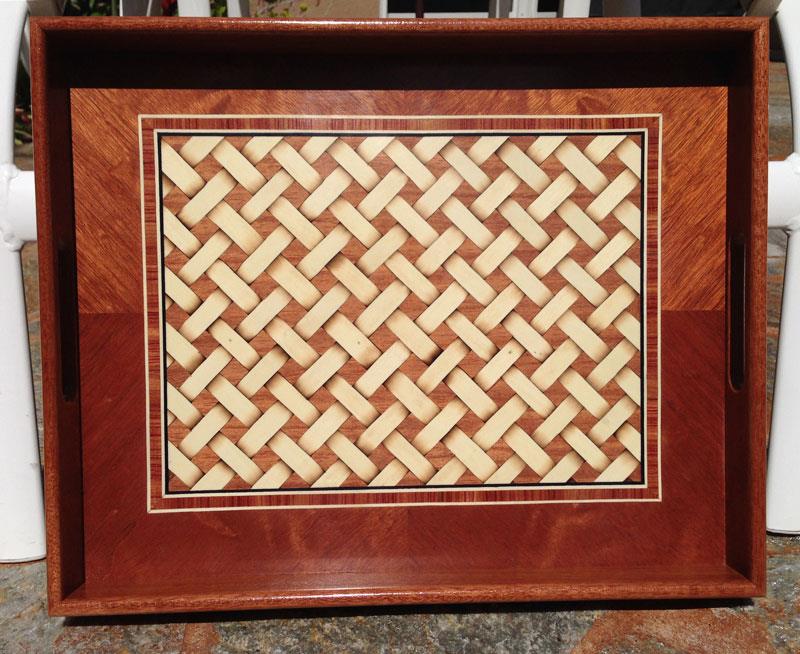
I recently built a blanket chest and wanted to create a unique veneer inlay on the inside of the lid. My wife and I used the Google Image search on the internet to look at photos of various inlay patterns. The one we found that we really liked was a lattice pattern as shown below on a serving tray.
I decided to use maple and mahogany veneers to make this pattern. I purchased these veneers online from Rockler Woodworking and Hardware. I bought 2 of the 3 sq. ft. Plain Maple Veneer packs (Item # 44504) and 1 of the 3 sq. ft. Mahogany packs (Item #44848). I also bought a 3/16” wide Black Maple Striped Inlay banding (Item # 44968) from Rockler to use around the perimeter of the inlay pattern to offset it from the cherry lid.
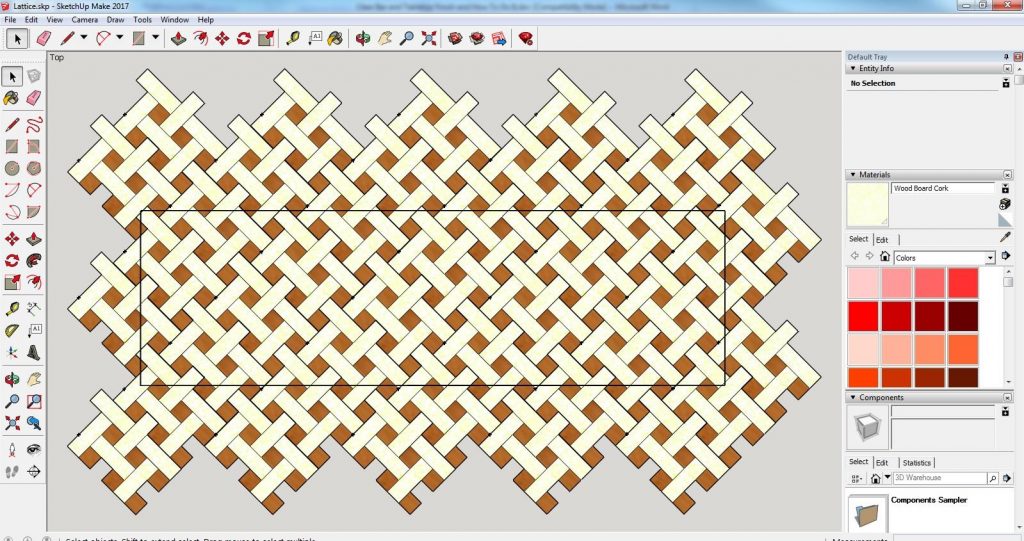
The first step was for me to figure the sizes of the pieces that would look good within the dimensions of the lid. The recessed section of the lid where I wanted to put the inlay was 35″ wide by 9-3/4″ tall. I used the free drawing program SketchUp to try different sizes to see which one would look best. I decided to go with the rectangular maple pieces being 1” wide by 3” long and the square mahogany pieces being 1” wide by 1” long. Here is what it looked like on SketchUp:
I used an X-acto knife, ruler and straight edge to start cutting out all the pieces. I decided to cut the maple pieces with the grain parallel with the long edge and cut the mahogany pieces at 45° to the grain. It ended up being 88 full size pieces of maple and 87 full size pieces of mahogany. Later, I would cut all the partial size pieces to fit around the perimeter. It took quite a while to cut all these pieces, but at least the NFL playoff games were on that weekend so it made time go by pretty quick.
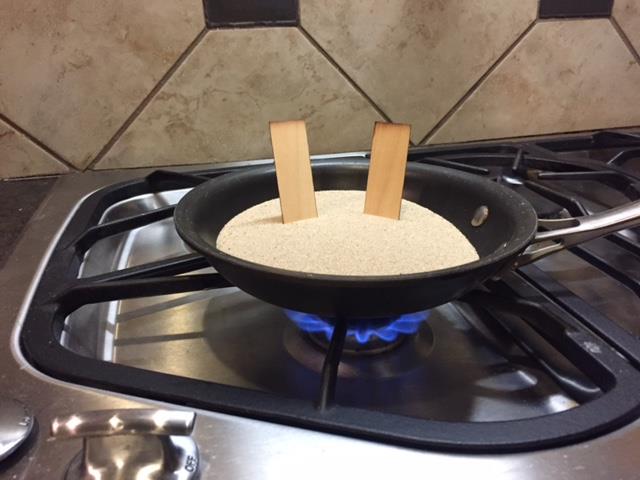
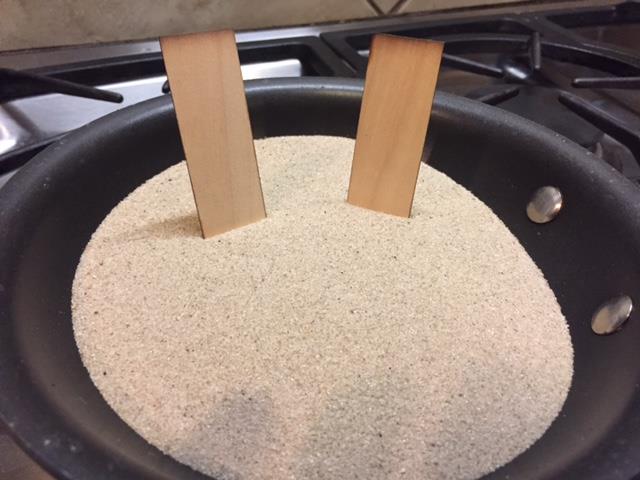
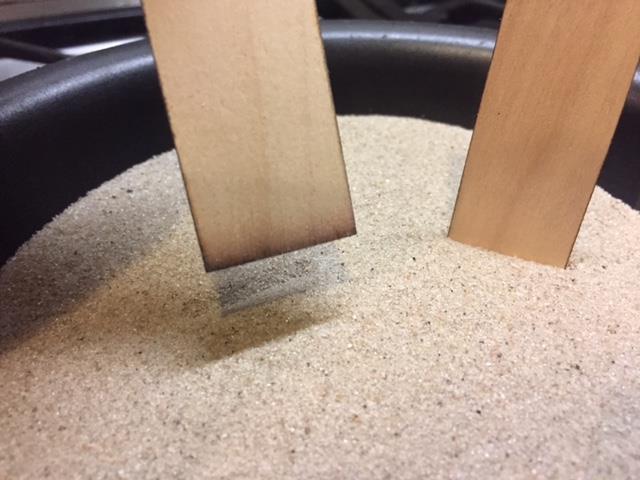
If you notice on the internet photo of the lattice pattern that the light colored pieces have a shading effect on the ends to give the appearance that it is woven. This is done thru a process called Sand Shading. Sand Shading is the art of applying heat to veneer in order to achieve shadow and depth. This process slightly scorches the edges of the veneer pieces to give a shading effect. To do this, I used a frying pan and put about 1 to 1-1/2 inches of sand into it. I heated it on medium for about 10 – 15 minutes stirring it periodically. Once the sand got hot, I stood the maple pieces into the sand, short ends down. I left it in the sand for about 10 seconds to slightly burn the ends. I then flipped the piece over to shade the opposite ends. Here are some pictures of the process:
To glue the banding and veneer pieces to the lid, I used Titebond Molding and Trim Wood Glue. I chose it because the glue has a strong initial tack, a fast set and it dries clear.
I decided the best way to do this was to start in the middle and work my way out piece by piece to the edges. I located the center of the area I was veneering and drew 45 degree lines as a guide. I started with gluing a square mahogany piece in the center and then worked out from there piece by piece. Here’s a picture after setting a few of the first pieces:
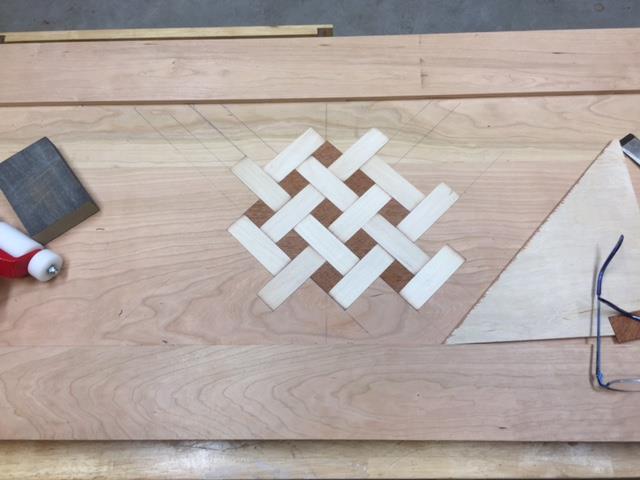
I would apply a thin layer of the glue evenly across the entire back of each piece. When I laid the piece down on the lid, I would use a J roller to press it down flat. Most the time it would stay down but sometimes a corner might start curling up and I would use the J roller again to press it down. I kept gluing piece by piece until I got close to the edges. I then glued in the black maple striped inlay banding around the perimeter of the lid opening. Finally, I finished it by cutting all the maple and mahogany partial pieces to fit on the perimeter.
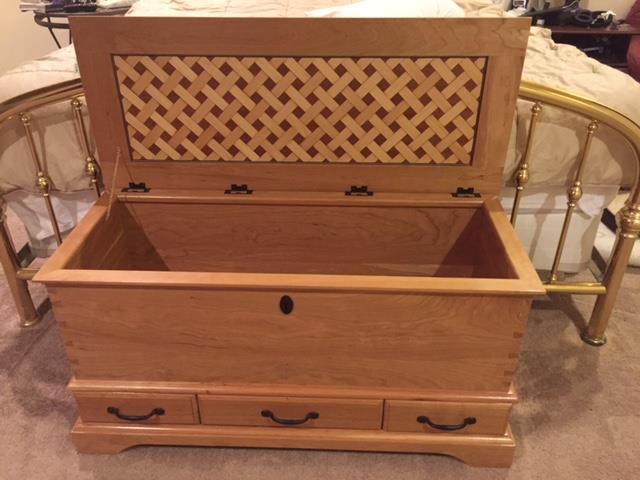
Here’s a picture of the completed lid:
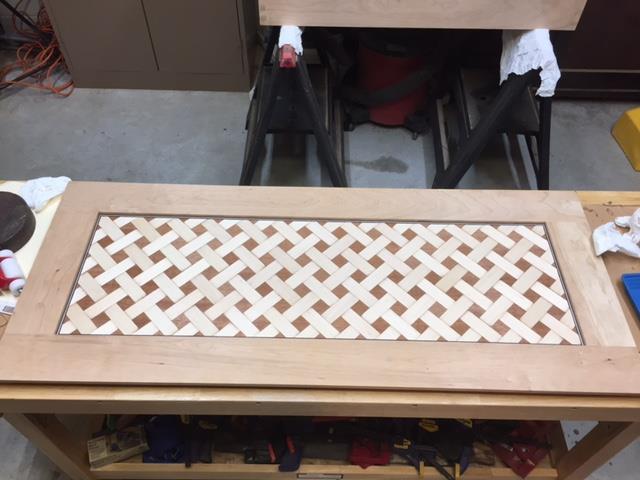
I finished the blanket chest by applying 9 wipe-on coats of Waterlox Original Sealer and Finish to the entire chest and over the veneered inlay. Here’s is what the completed blanket chest looked like before and after finishing:
Before Finishing:
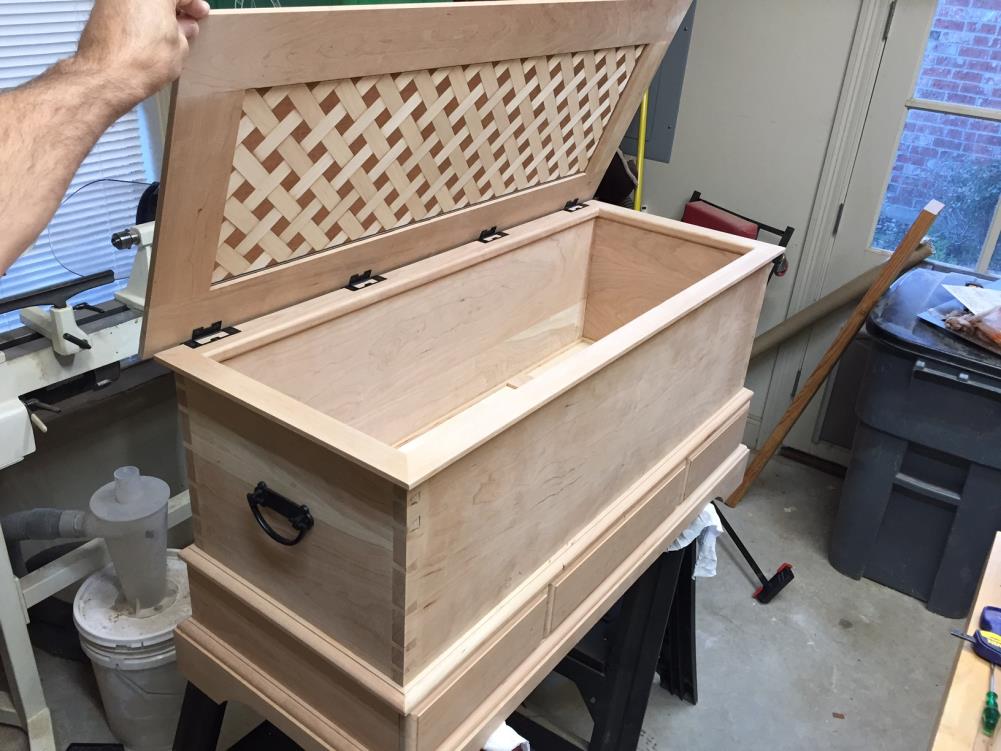
After Finishing:

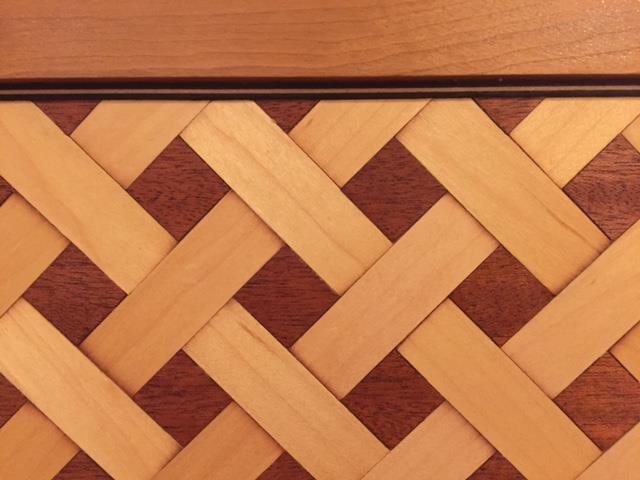
Close Up of the Veneered Inlay with black maple striped banding:
Leave a Reply
You must be logged in to post a comment.